
Table of Contents
Introduction
Step 1: The Data
Step 2: Creating a Task
Step 3: Model Training and Testing
Step 4: Review Models
Step 5: Publishing the Model
Introduction
This tutorial illustrates how to use OneClick.ai to solve an everyday business problem. In this example, we use the “Dress Recommendation” data set from the UCI Archive, which we’ve slightly modified to fit the tutorial.
A dress store is on a campaign to better manage their inventory, avoid excessive overstock, and minimize lost sales from out-of-stock events. Normally, they use prior sales data to determine which dresses are most worth keeping in stock. Now, they have a collection of brand new dresses to choose from, and want to know the sales potential of each. An AI model gives them those numbers.
Step 1: The Data
Every task needs a training data set. The data set in this task contains information about past dresses and stocking recommendations:
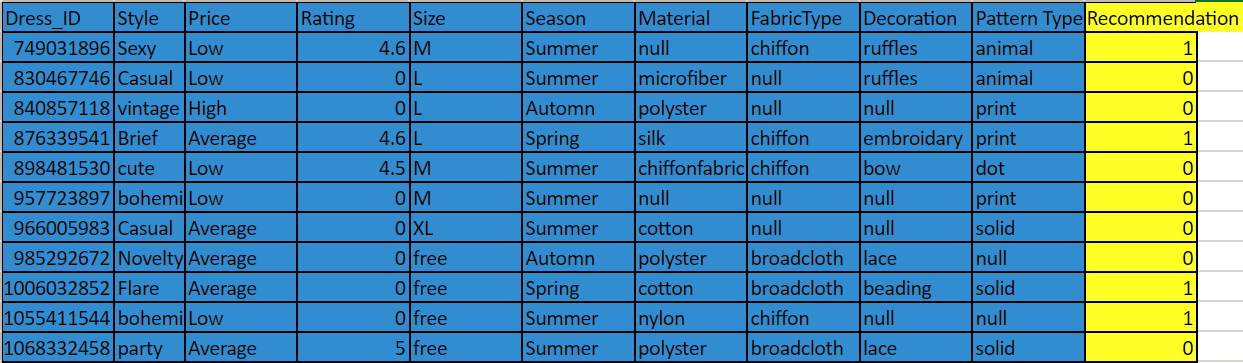
We look for several different variables in the data set used for model training:
- Features: the data that informs the predictions. This data should be as varied and detailed as possible, so no crucial element goes overlooked—say, for example, if a particular kind of fabric sells well across many different styles.
- Label: what the user wants the model to predict—in this case, whether or not to restock the dress (1 for yes and 0 for no). Here that column is filled, because this is a past data set that we’re using to train the model. Future data sets for this model won’t require this recommendations column.
We recommend uploading data sets in .csv file format. For more information on formatting data, go here.
Step 2: Creating a Task
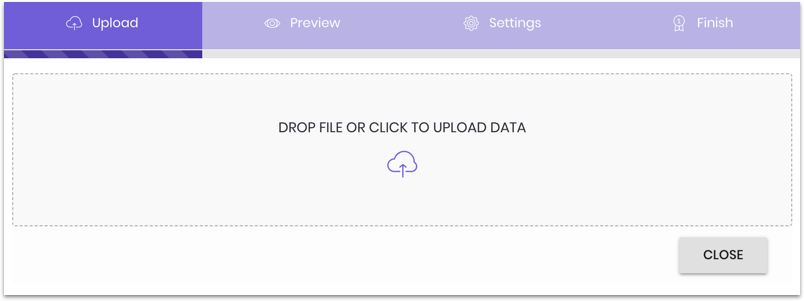
We now use this data set to train an AI model that calculates a dress’s sales potential. To begin, the user simply clicks the upload button and uploads their data set:

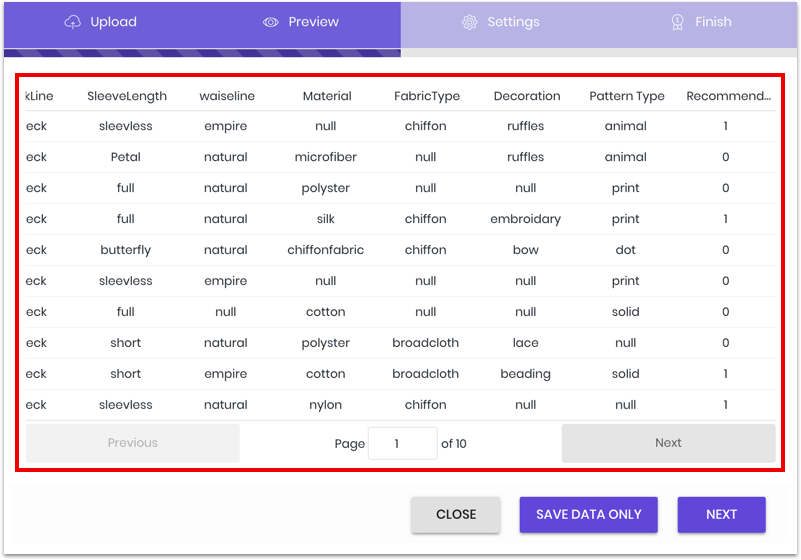
Once the data is uploaded, we have a chance to review it and correct any errors before finalizing:
After uploading and reviewing the data, we then set our task parameters:
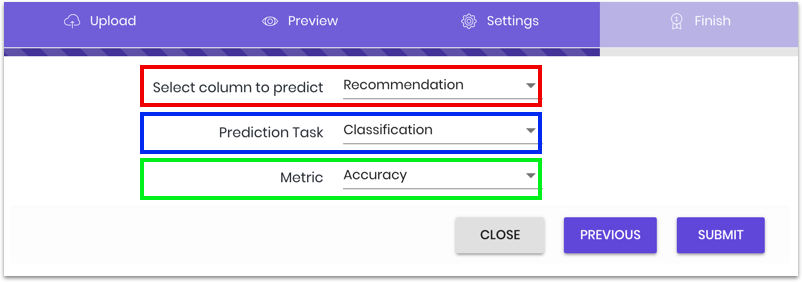
- Select column to predict: where the user specifies the column that they want predictions for.
- Prediction Task: where the user selects the task they want the model to perform; as our chosen column is a binary decision (1 means yes, 0 means no), we choose “Classification,” a task for discrete values.
- Metric: where the user chooses their desired metric to quantify the prediction performance of the model. We have two options: “Accuracy,” which measures the percentage of predictions that are correct; and “Logloss,” which considers both the correctness of a prediction and its uncertainty in terms of probability. Because we’re working with binary in this example, we choose “Accuracy,” a metric suitable to yes/no scenarios.
Note that the list of metrics changes depending on the choice of prediction task. For other available learning tasks and metrics, please refer to Classification and Regression.
Step 3: Model Training and Testing
The process of training and testing models is entirely automatic, but not always instantaneous. Depending on the type and size of the data, the process can take anywhere from a few minutes to a few days. In the meantime, we can monitor its development:
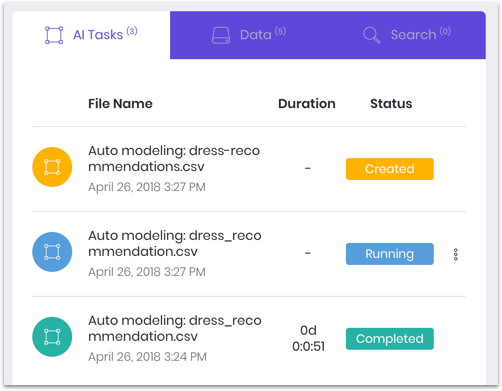
Step 4: Review Models
Once the task status reads “Completed,” we then review and select the best model. Clicking on the file name gives a detailed look at the results:
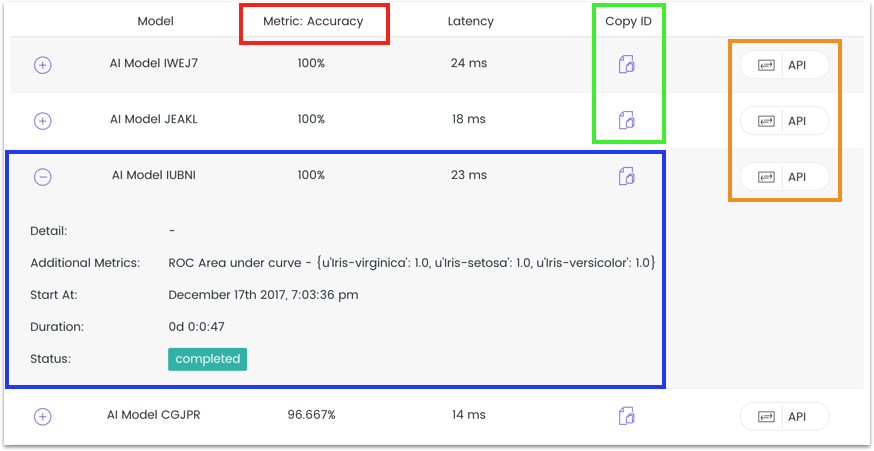
Here are the key points to consider when choosing the best model:
- Metric: the pre-selected metric evaluation should most inform model selection
- Detailed Info: where to view additional details of the model to factor into the decision-making process
- Copy ID: where the user can copy the ID of each model for use in publishing
- API Exporting: if exporting the model to another site, this option formats and publishes the model as an API (For more information on APIs, click here.)
After choosing a model, the final stage is to apply the model and make a prediction.
Step 5: Inference
A model is just a file until it is put it into action making predictions, otherwise known as “inference.” There are two methods:
- Use the built-in chat bot to generate new predictions
- Deploy the model as an API to interact with programmatically
The first method uses an internal program called “Eva.” Key things to know when working with Eva, your friendly robot helper:
- Chat Window: shows the user’s “conversations” with Eva; where you view and download your results
- Chat Box: where the user types in their “messages” to Eva; note that each input must begin with “@eva”
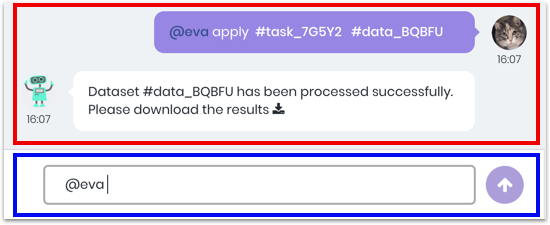
In this scenario, we input “@eva apply [task ID] [data ID]” which automatically applies the selected prediction model to any selected data set. (Task and data IDs can be found by clicking on the gear icon next to each model, then on “Copy ID”.)
Eva then gives us our predictions:
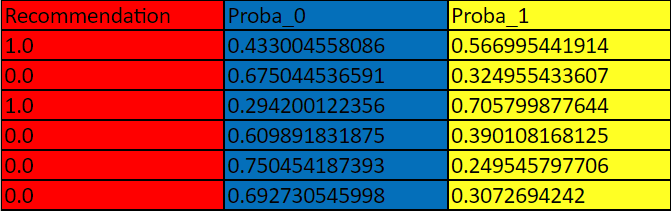
There are three distinct columns, each representing a key figure concerning whether or not to stock certain dresses:
- Recommendation: the general recommendations on whether or not to stock a dress, 1 as “yes” and 0 as “no.” These selections are based on a 0.5 or 50% threshold—in other words, whether there was a greater than 50% certainty for 1/yes or 0/no.
- Proba_0: the exact probability of a 0/no answer.
- Proba_1: the exact probability of a 1/yes answer.
The second and third columns are useful in providing more detailed assessments of an item’s sales potential. For example, say the store has inventory space for only one dress from the new collection. While both the first and third-row dresses got a “yes,” we can see that the third-row dress has the higher sales potential of 71% yes to 29% no—making that style the better choice.
Summary
Thank you for taking the time to familiarize yourself with OneClick.ai and one of its many applications, predicting possible business scenarios. Along with its wide application variety, OneClick.ai dramatically decreases the time it takes to create a model, taking minutes to do what used to take days. In addition, our users get to skip the hassle of learning difficult jargon and AI concepts—to use AI, all you need is data.